Being a surfer is not just about time spent in the water. You should also know basic surfboard repair, particularly when it comes to fixing a ding. Dings are fairly common especially if you’re a beginner, although experienced surfers, due to normal use and abuse, have to deal with dinged boards pretty often as well.
Why learn how to fix a ding you ask? While it’s true that repair specialists will always do a better job at repairing your surfboard, you don’t really need their help when it comes to fixing a minor ding. You can save a lot of money doing it on your own, not to mention save yourself from the hassles of waiting for weeks for the repair to finish.
You can also save money in another way. Instead of buying a brand new surfboard, you can buy a secondhand board with some minor dings for cheap and fix the issues yourself.
How to Fix a Ding
Here’s a quick beginner guide to fixing minor dings:
1. Gather the necessary supplies.
You can either buy a complete ding repair kit or buy the following one by one:
• Safety mask and goggles • Sandpaper (80 or 100 grit, plus 220 grit) • Masking tape • Fiberglass cloth • Wax comb • Knife • Q-Cell (if there are large voids/holes to fill) • Sanding resin and catalyst • Acetone • Paint brush
2. Remove rotten and damaged area.
If it’s a fairly new ding, wait for the board to dry so you don’t have to remove much. But if the ding happened in the past, check if there are rotten areas that you need to remove as well.
3. Clean the area.
This is where you’re going to use the wax comb in order to remove any remaining wax. The acetone will also be used to remove other particles.
Once you’re confident that it’s clean, use the sandpaper to sand down the area. Now that the area is clean and sanded, surfboard repair will be more effective because the resin mixture will bond easily.
4. Protect the surrounding areas with masking tape.
In addition to protecting the surrounding areas, doing so will also help with containing the repair and minimizing the sanding needed.
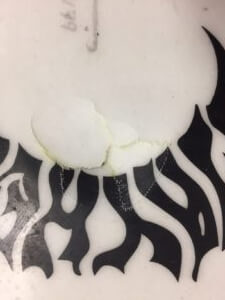
5. Fill in the gaps/voids with Q-Cell.
This step is only needed if there are large holes or voids in the board. Place an ounce of sanding resin in a mixing cup and slowly stir in Q-Cell. Once you have a thick paste, add 10 catalyst drops. Stir again and then apply on the dinged area. This will serve as a foam replacement.
Make sure that you pour the mixture slowly. Otherwise, air bubbles will form. Use the stick that you used to stir the mixture to make sure that every crevice is filled with the mixture.
Pour the mixture so that it sits slightly above the area that you’re working on. Wait for it to harden.
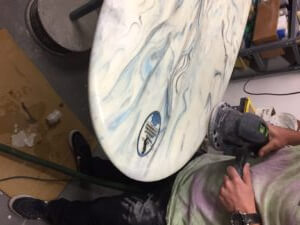
6. Sand the area down.
Sand it until the Q-Cell mixture that hardened is now flat with the board. As soon as you gain more confidence in doing surfboard repair, you’ll be sanding lower to accommodate the resin coat.
7. Glass the repair.
Cut 2 circular pieces of fiberglass. Make sure that one is a little bit bigger than the other, and both are a bit bigger than the repair area. Mix an ounce of sanding resin and 10 catalyst drops. Stir well until it begins to warm up/kick.
8. Apply the mixture from step 7.
Use the paintbrush for this step. Place the smaller fiberglass sheet straight on the area and then add a bit of the resin mixture. Allow the fiberglass to absorb the resin while it spreads. Follow the same steps for the bigger fiberglass patch.
For this step, make sure that the resin is spread out evenly and that the fiberglass sheets are pressed firmly.
9. Sand the area again.
Once the resin has hardened, use sandpaper to sand again. Make sure that there’s no bulge and be sure to smooth down the edges. However, it’s important that you don’t sand too forcefully or else, you risk burning through the fiberglass.
10. Add a hot coat.
Add another layer of resin with a few extra drops of catalyst added to the mixture.
11. Sand and Polish the repair.
The final step is wet sanding. Wet sand the repair area with high grit sandpaper (such as 320 up to 600 grit) until you match the finish of the rest of the board. For a gloss finish, consider using a polisher and some diamond cut compound to get that shine your looking for.
12. Let it sit for 24 to 48 hours.
At this point, you just have to wait for it to cure. Afterwards, give yourself a pat on the back for a job well done! You just saved yourself some money and weeks of waiting!
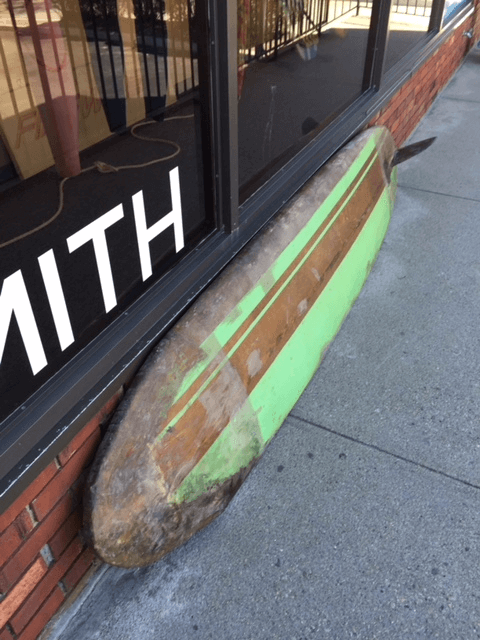
Get Surfboard Repair Help if Needed
Ask for a second opinion. Figure out if the board is worth saving or not. The board pictured on the left was clearly not!!
When in doubt, we can always help you out at our surfboard repair center.